Fermented salsa has faint effervescence and a distinct tangy and sour flavor, which sets it apart from the store-bought or the regular home-cooked salsa. The sourness is not too strong when you ferment it for a short while. Depending on your preferences, you can control the level of sourness in the salsa.
Print
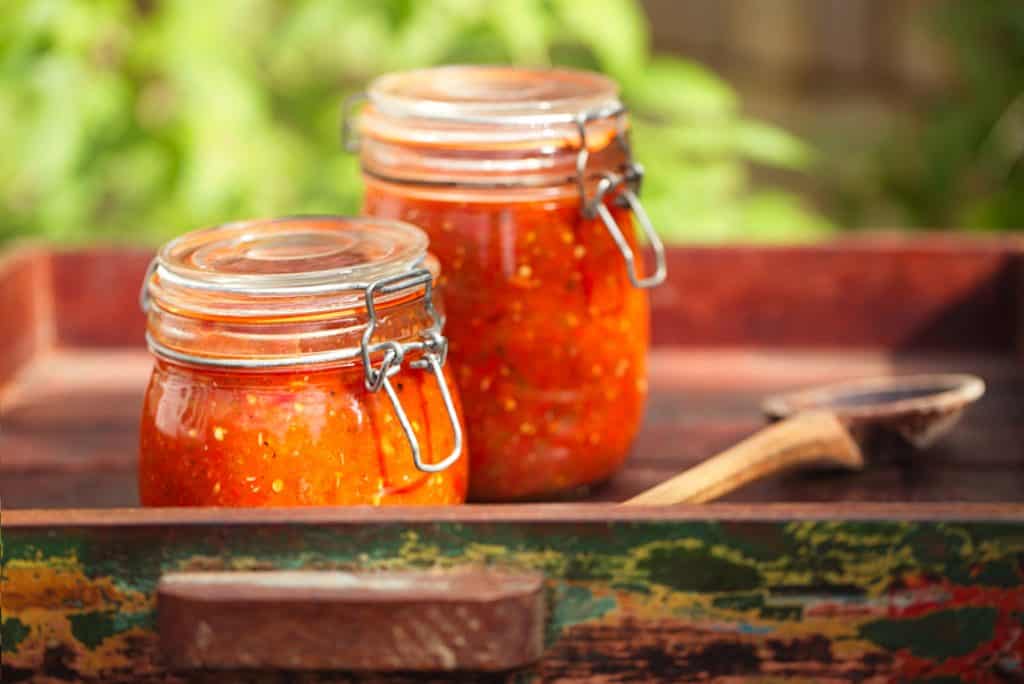
Fermented Salsa Recipe
- Total Time: 25 minutes
- Yield: 1 quart 1x
Description
Fermented Salsa is packed with probiotics and nutrients that can enhance your gut health and provide a great experience you will relish.
Ingredients
- 1 pound of cherry tomatoes, chopped in halves
- 2 green onions, chopped
- 2 to 3 cloves of garlic, finely chopped
- 3 tablespoons cilantro stems, chopped
- 1 orange or green pepper, one half chopped and another half reserved for “seat-belting”
- 2 tablespoons whey
- 2 tablespoons fresh lime juice
- 1 tablespoon honey
- Salt to taste
- Filtered water
Instructions
- Add all the ingredients except pepper half, whey, and water. Combine the ingredients in a bowl and mix well.
- Transfer the ingredients to a clean mason jar. You may have to push them down gently. Keep adding and pushing the ingredients gently until the jar is packed till the neck.
- Pour the whey slowly allowing it enough time to settle.
- Slowly fill the jar with a sufficient quantity of water until the jar is full till its neck.
- The next step is called “Seat-belt the salsa”. For this step, trim the half of the pepper until it is slightly larger than the mouth of the jar. Wedge the piece of pepper onto the opening of the jar making sure the pepper, as well as the salsa beneath it, are trapped under the shoulders of the mason jar.
- Top with water gently until all the ingredients are submerged.
- To allow the salsa to ferment, cover the jar and store it in a dry place out of direct sunlight. Make sure you have wiped the outer side of the jar. Always keep the jar on a plate, and place a clean dish towel on its top to prevent dust and flies from entering.
- Check the salsa daily to see if it has reached the desired level of sourness. When you feel the salsa has fermented to your liking, seal with a lid and transfer the jar to the fridge. You can store the fermented salsa in the refrigerator for 3 to 6 months.
Notes
- Chlorinated water may inhibit fermentation. Hence, it is best to use distilled, spring, or filtered water, whenever possible. It is also advisable to rinse the veggies in un-chlorinated water instead of tap water.
- You can assess the level of fermentation by checking the extent of bubbles appearing on the top of the jar. The appearance of bubbles is a sign of fermentation occurring actively.
- Prep Time: 15 minutes
- Cook Time: 10 minutes
- Category: Fermented Food
- Method: Fermentation
- Cuisine: Mexican
Cooking tips for beginners
- If you are a beginner, it is best to weigh the ingredients using a kitchen scale. This helps you get the perfect taste of fermented salsa with the desired level of sourness. Once you get the hang of it, you can change the ingredients or the amount of vegetables you add to the jar depending on the specific taste and flavors you like.
- For consistent results, add 1 teaspoon of salt for one cup of fermented salsa. Make sure you stir in the salt evenly so that it is properly distributed throughout the vegetables and provides delicious and consistent results.
- Make sure that you have closed the mason jar tightly. This is necessary to ensure the gas produced during fermentation does not escape. Closing the jar with an air-tight lid will also help to keep mold at bay.
- When adding vegetables, try not to leave much of space or gaps between the pieces. Remember that oxygen can prevent fermentation. So, any air left into the jar can slow down the process of fermentation taking it longer for your salsa to be ready. Hence, it is best to fill the jar completely with salsa and then, gently press the vegetables down until the jar is packed till its neck.
Conclusion
Of all of the things I felt I could ferment, salsa seemed to be the most horrible idea. But, that was only until I actually tried doing it and tasted it. If you are still not able to wrap your brain around how fermented salsa could be delicious, do try this recipe and you will realize what great flavors you had been missing so far.

Hi Gigi, I’ve been looking through your delicious sounding recipes & really want to make the fermented Salsa, but I’m unsure of the sealing of the jar, hoping you can clarify. In #7 you say… to ferment, cover the jar & store in a dry place… but then you go on further to say (still in #7), place a clean dish towel on its top to prevent dust & flies from entering. Also, further down in the cooking tips for beginners you say… Make sure that you have closed the mason jar tightly. This is necessary to ensure the gas produced during fermentation does not escape etc.
So, I’m confused as to when I should close the lid of the jar? Is it at the beginning as soon as it’s been filled or sometime later?
Thanks for your lovely recipes & regards, Janne
Hi Janne, thanks for stopping by. Once you fill-up the jar with salsa ensure to close it tightly with a lid. Then place the jar on a plate, cover it with a tea towel and let it ferment away from the direct sunlight. During the fermentation process, the jar may leak due to the build-up of carbon dioxide as the fermentation occurs hence the suggestion to place the jar on a plate to collect potential leakage. Hope this helps! Good luck! Gigi
Thanks so much for answering quickly. Now I see where I got myself confused, I’m hoping to make a batch tomorrow & possibly some sauerkraut the day after, using your recipes.
Best wishes from Australia, stay healthy, regards Janne
You’re welcome Janne 🙂 Enjoy making salsa and sauerkraut! Stay well and safe too!
Hey Gigi. Quick question – will any tomatoes do, as long as the weight is the same?
Hi Sandi,
Yes, any tomatoes should be fine as long as the weight is the same.