Description
Step by step guide on making sourdough starter at home.
Ingredients
Scale
To begin your starter:
- 1 cup whole wheat, rye or all-purpose flour
- 1 cup water
To feed your starter:
- 1 cup whole wheat, rye or all-purpose flour
- ½ cup water
Instructions
- Day One: Sterilise the glass container with boiling water or wash well with warm soapy water. Combine whole wheat, rye or all-purpose flour with the cool water in the glass container. Stir everything thoroughly until combined into smooth batter with no dry flour anywhere. Close the container and leave it to ferment at room temperature for 24 hours.
- Day Two: You may or may not see a bit of growth and bubbling. If there is no bubbling at all that is fine too. Sometimes it takes for the starter longer to begin to ferment. Discard half of the starter and feed the remaining starter by adding water and flour. Mix it well to remove any dry flour until combined into smooth batter. Close the container and let the mixture rest at the room temperature for 24 hours.
- Day Three: By now surface of your starter should look dotted with bubbles and starter should look larger than on the previous day. Discard the half of the starter and add new flour and water. Stir well until smooth batter texture is achieved. Close the container and let it sit at the room temperature for 24 hours.
- Day Four: Your starter should be visibly larger than previous day and more bubbles should be formed. You will also notice that starter smells a little sour and yeast-like. Repeat the Day Three feeding process and let it sit for 24 hours at the room temperature.
- Day Five: Your starter should be almost ready. Repeat Day Four process.
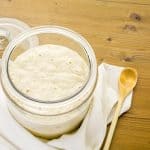
- Day Six: Your starter should be ripe and ready for use in baking. Keep in mind that depending on the environment starter may take up to 10 days to growth. If you feel like your starter has not grown much in the last five days, there are no many bubbles and does not have sour and yeast smell then continue to feed it for another few days.
- Used starter can be stored at the room temperature for several days but it requires feeding every second day. You can also store the starter in refrigerator but must be removed and fed once a week at room temperature for at least 12 hours before returning to the refrigerator.
Notes
Equipment: scale or measuring cup, glass container with a lid and a mixing spoon.
- Prep Time: 50 minutes
Nutrition
- Serving Size: 1 cup
- Calories: 432
- Sugar: 0.4 grams
- Sodium: 7.2 mg
- Fat: 2.1 grams
- Saturated Fat: 0 grams
- Trans Fat: 0 grams
- Carbohydrates: 91 grams
- Fiber: 8.1 grams
- Protein: 14 grams
- Cholesterol: 0 grams